How to Provision and Activate a New Android Device
Follow these steps to securely pair a new or factory-reset Android device to your KioskGrid account using QR code provisioning.
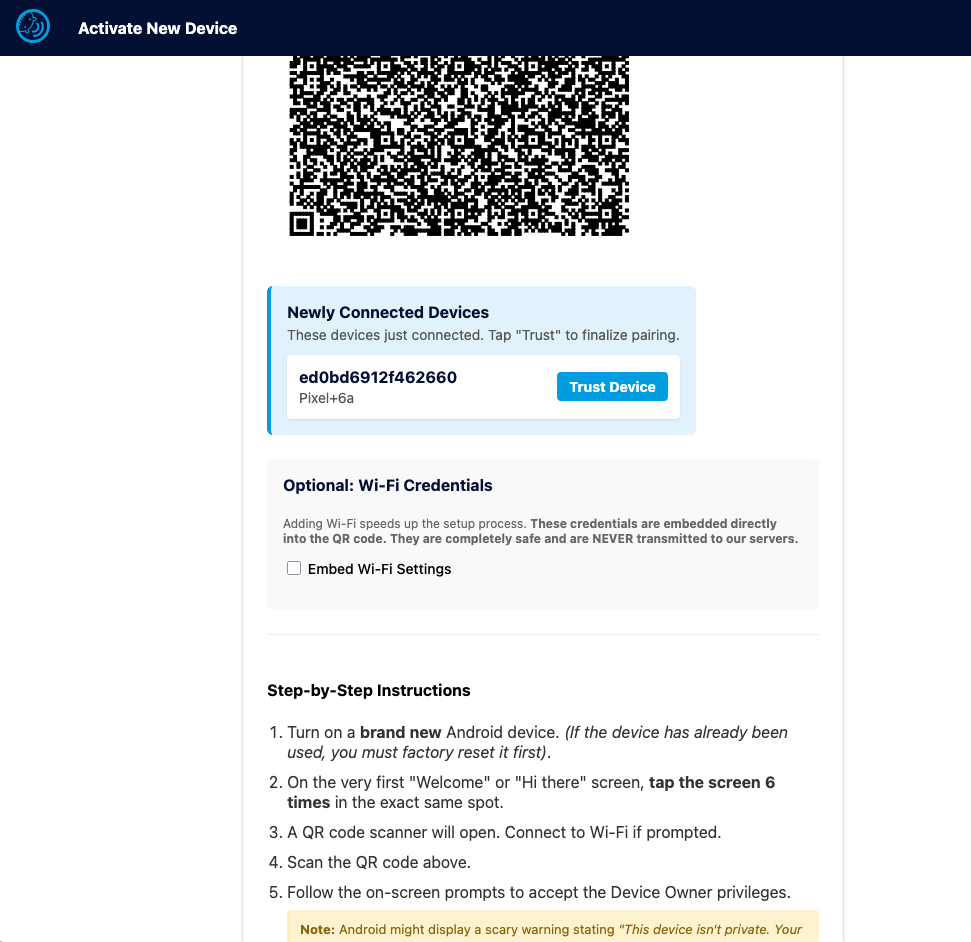
1Open the Activation Page
Go to your Console sidebar and click the + button to open the Activation Page. Keep this page open on your computer.
2Tap the Welcome Screen
Turn on a brand new or factory-reset Android device. On the very first "Welcome" or "Hi there" screen, tap the screen 6 times in the exact same empty spot to trigger the hidden QR code scanner.

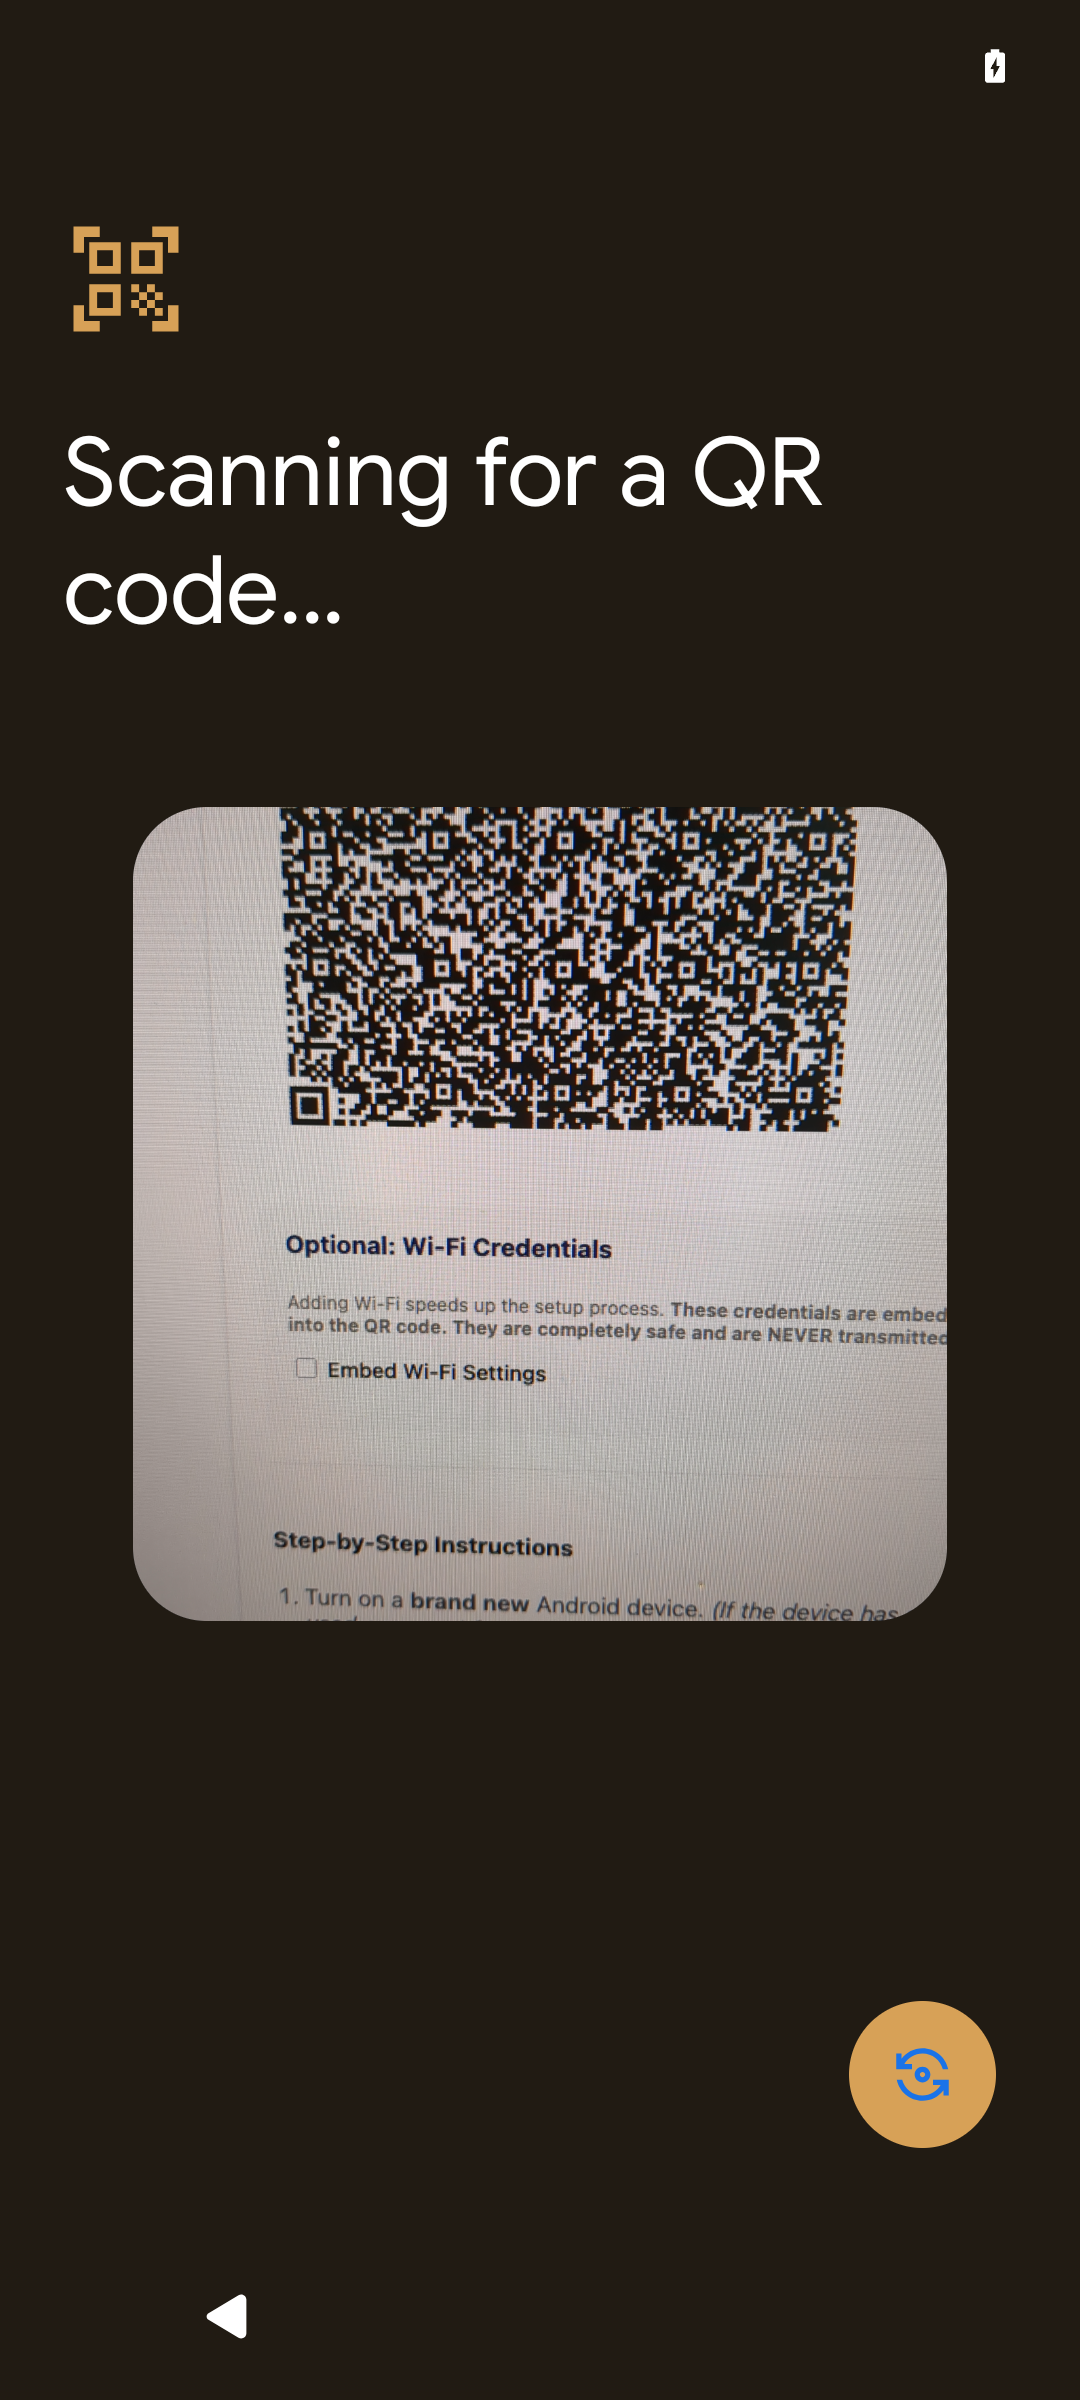
3Scan the QR Code
The device will launch a QR code scanner. If prompted, connect to a Wi-Fi network first. Then, scan the QR code displayed on the Activation Page on your computer.
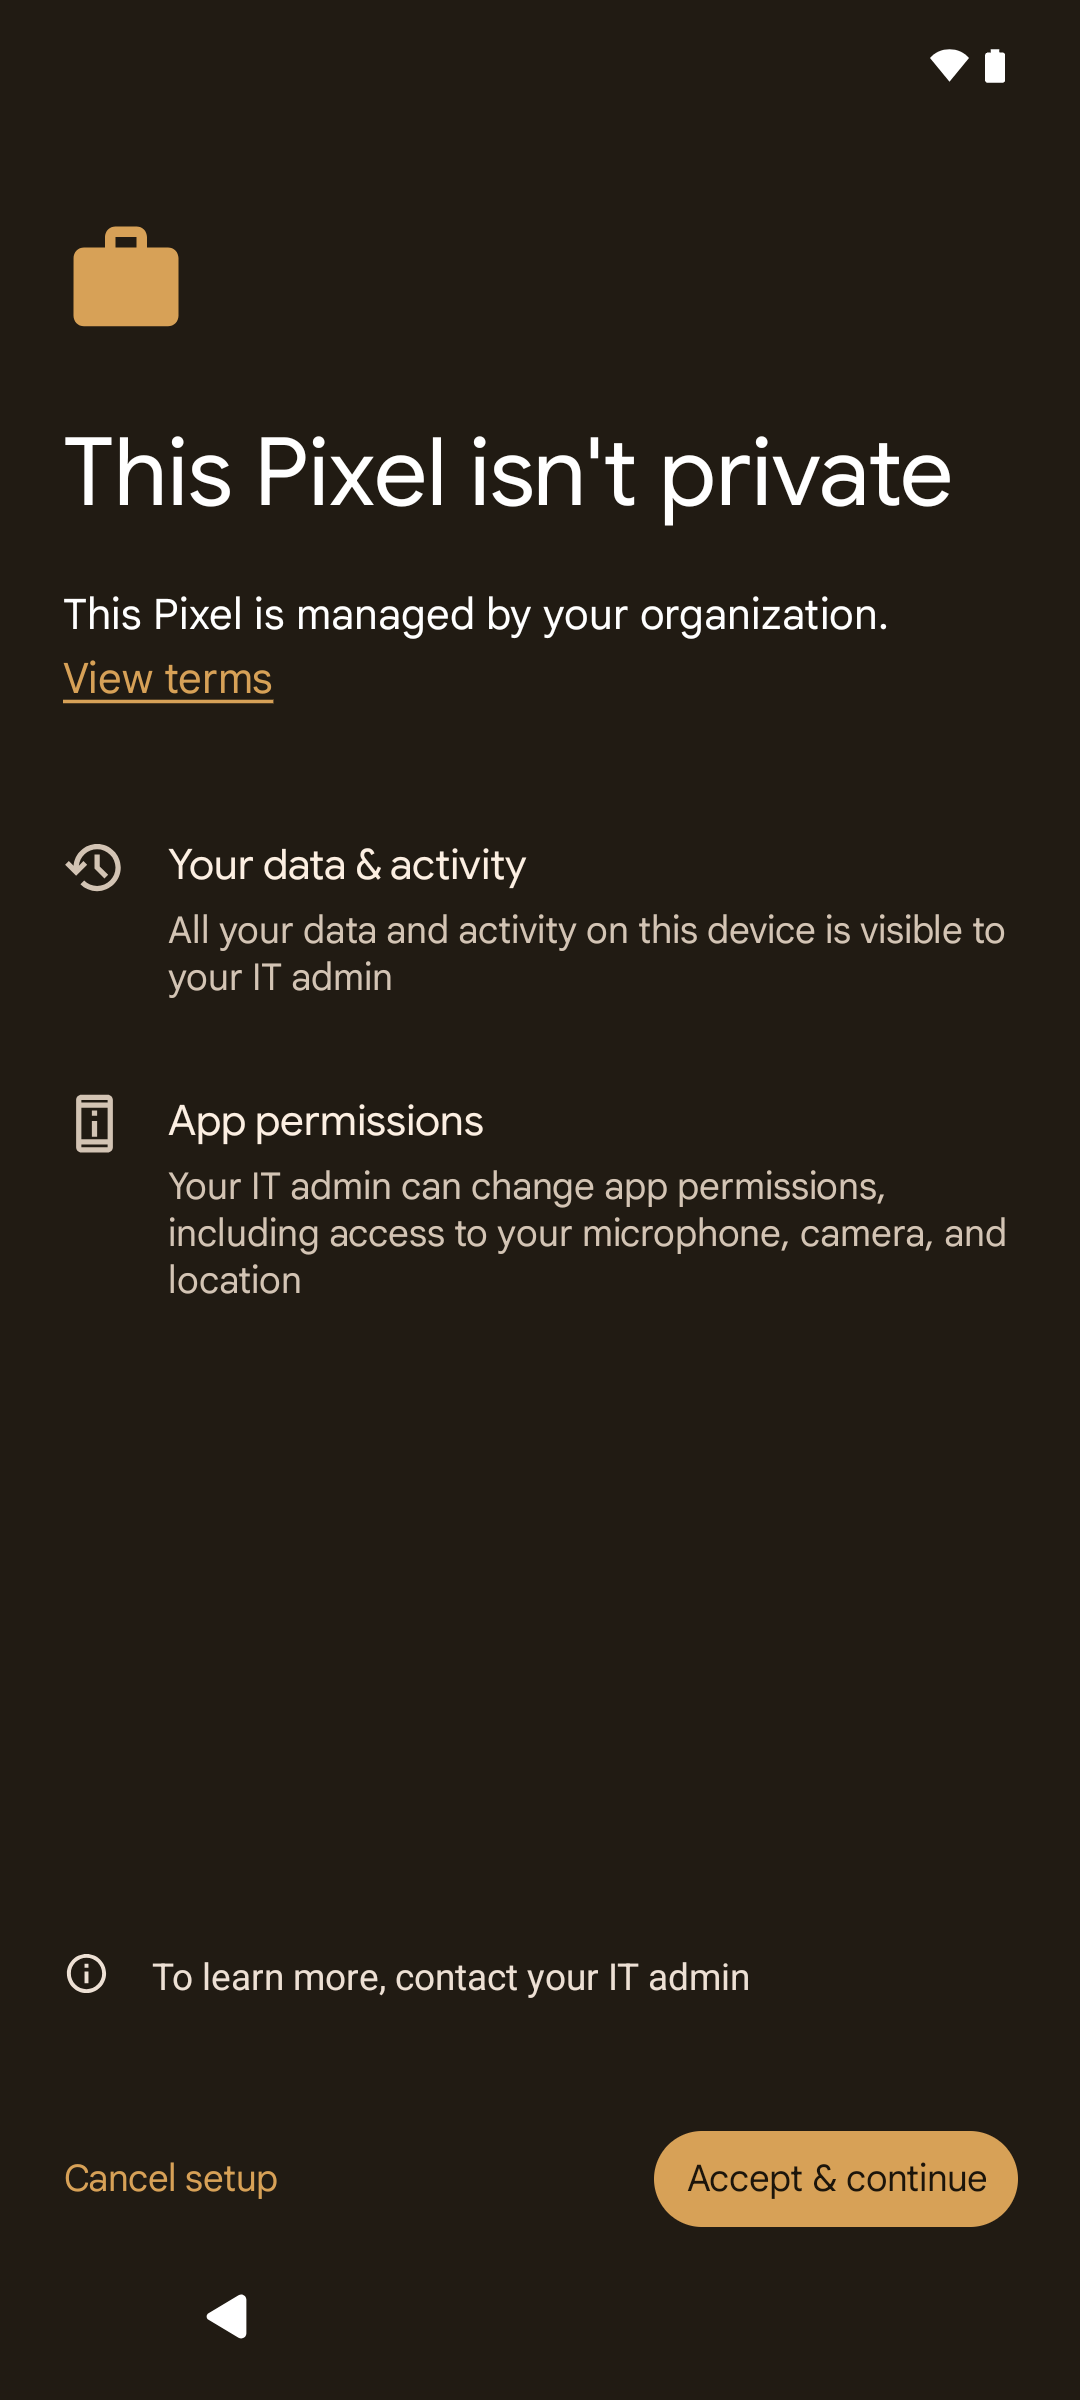
4Accept Device Owner Privileges
Follow the on-screen prompts to set up your device as the administrator. The device will download the admin app and register itself.
Important: Android will display a scary warning stating "This device isn't private. Your IT admin may be able to see your data." Do not panic. You are setting yourself as the IT admin. Communication is fully encrypted and only you have access to this device via your Console.
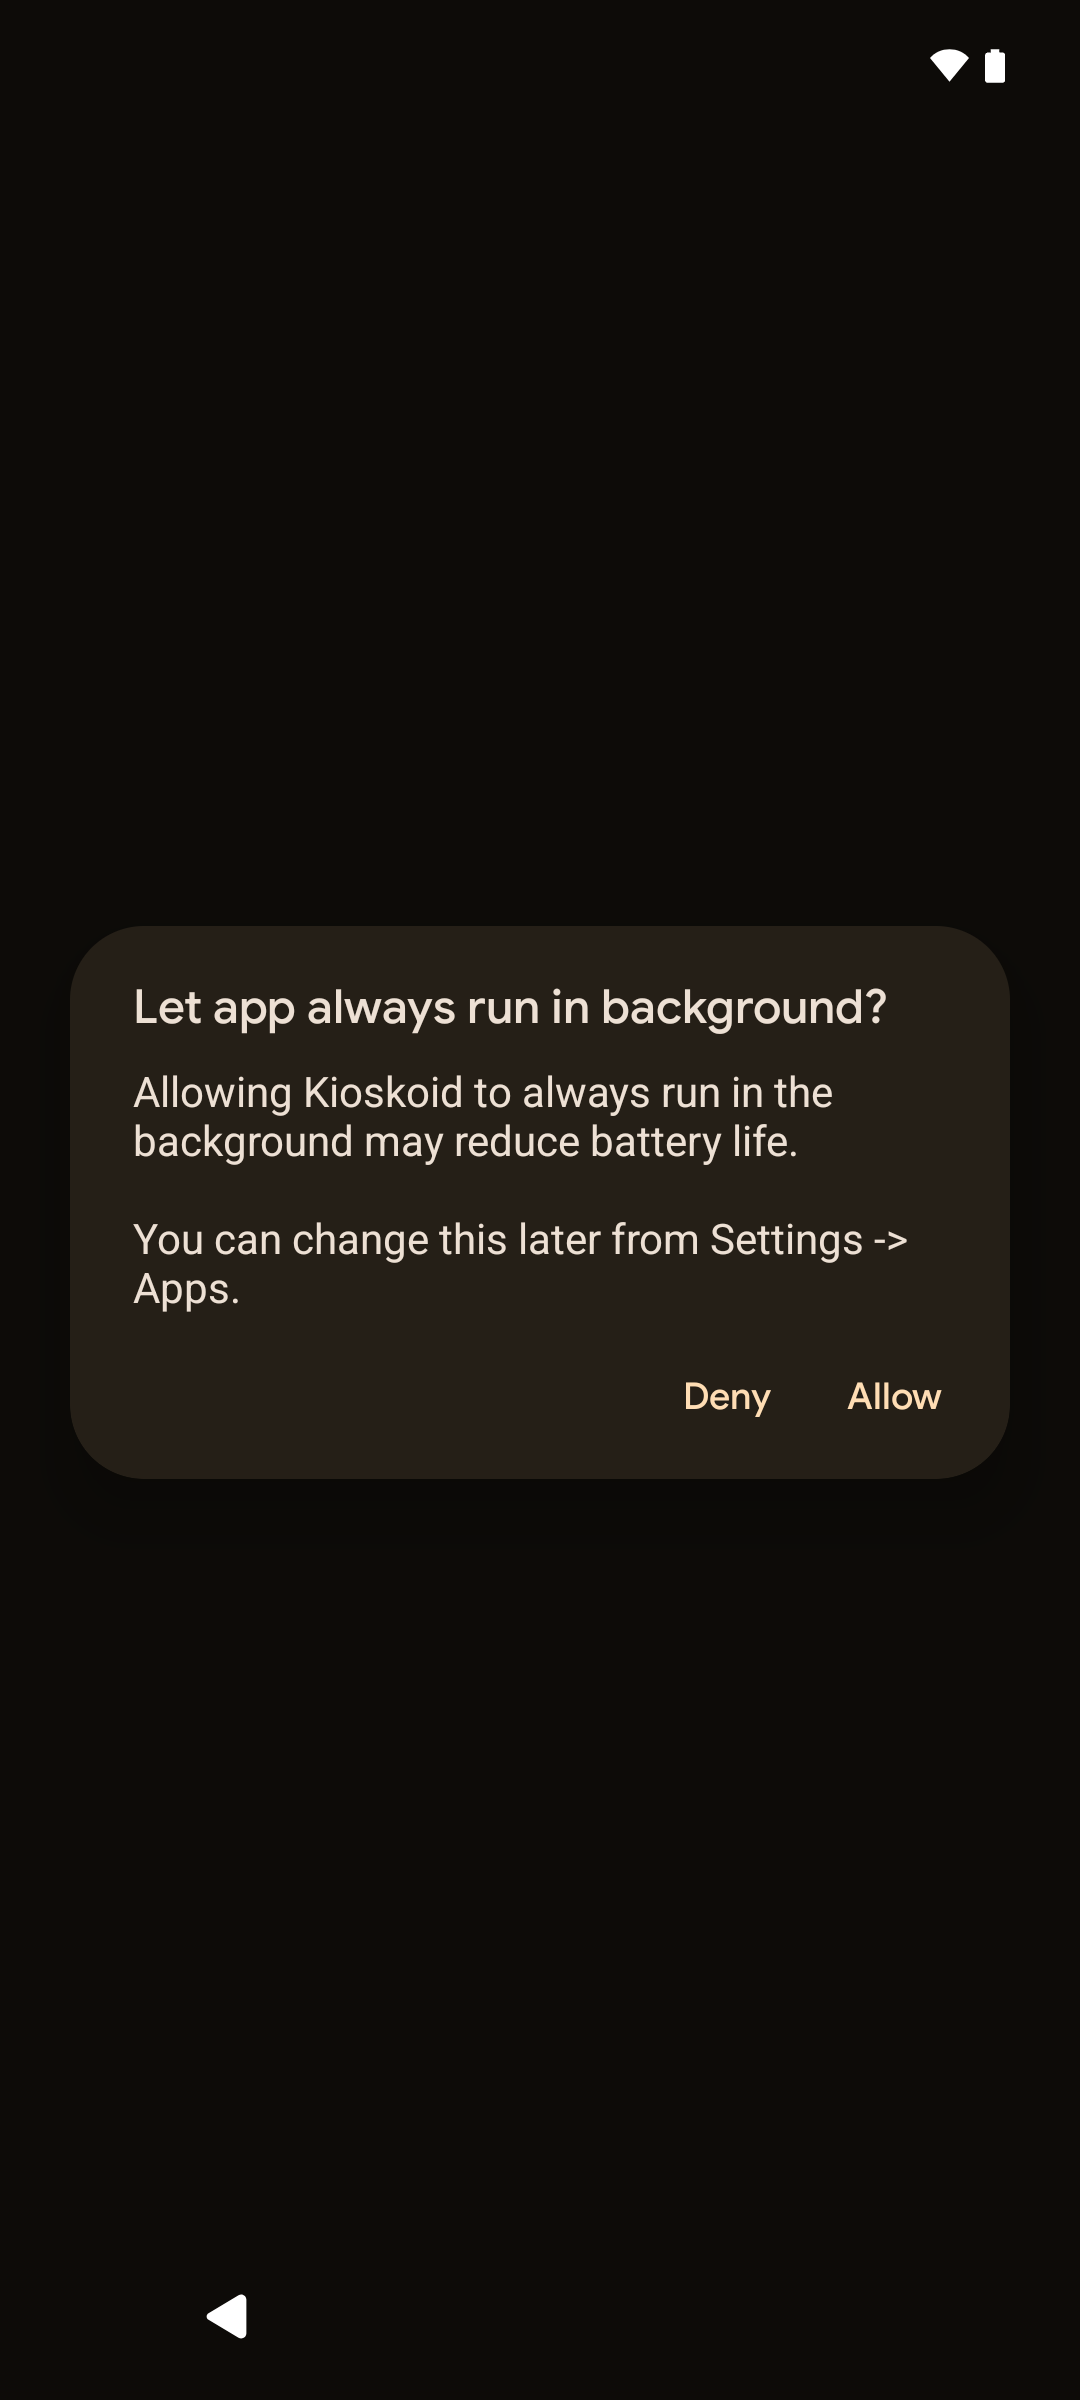
5Allow Background Execution (Crucial)
Depending on your device manufacturer, you may see a prompt asking to let the app always run in the background. You must allow this. If battery optimization kills the device admin app, you will lose remote connection to the device.
Crucial Step: Ensure battery optimizations are turned off for the KioskGrid app. Select "Allow" when prompted.
6Trust the Device in Console
Once the phone finishes its setup, look back at your computer's Activation Page. The newly provisioned device will appear in the "Newly Connected Devices" section. Click Trust to finalize the pairing and add it to your Console.